A bike maintenance checklist turns vague good intentions into repeatable actions, so nothing important gets skipped and small problems get caught while they are still cheap. Run a quick ABC check—air, brakes, chain—before every ride, a short cleaning-and-wear pass weekly, a measured inspection monthly, and a deeper service each season. This guide walks through each of those layers, tells you exactly which tools to buy first, and shows a consolidated list you can print and keep by the bike.
In this guide
- Why a checklist beats guesswork
- The essential home tool kit
- Pre-ride quick checks: the ABC method
- Weekly checks
- Monthly checks
- Seasonal and annual checks
- The printable consolidated checklist
- What to leave to a bike shop
Why a checklist beats guesswork
Most bikes are not neglected on purpose. They are neglected because the owner is not sure what to check, how often, or what “normal” looks like—so the whole job feels large and gets postponed. A checklist removes that friction. It breaks maintenance into small, time-boxed blocks and tells you the trigger for each one: some tasks run on a calendar, some on mileage, and some on evidence you see or hear during a ride.
The payoff is not just tidiness. The two failure modes that cost cyclists the most money and the most trouble—flat tires and a worn drivetrain—are almost entirely preventable with a few minutes of routine attention. A tire aired to the right pressure resists pinch flats and rolls better. A chain replaced when a gauge says so, rather than when it snaps, saves the cassette and chainrings that a stretched chain quietly grinds away. A checklist is simply the cheapest insurance you can buy for a bike.
There is also a compounding effect. A bike that is checked regularly rarely develops the kind of neglected, seized, or badly worn parts that turn a ten-minute job into an afternoon. Grit left on a chain accelerates wear on every part it touches; a slightly loose bolt works itself looser; a small brake-pad glaze becomes a contaminated caliper. Each skipped check quietly raises the cost of the next one. Consistency, not intensity, is what keeps maintenance cheap—ten minutes a week beats a rescue overhaul twice a year.
There is a safety dimension too. Brakes, wheels, and the steering assembly are the parts that hurt you when they fail. A 60-second pre-ride check on those systems is not busywork; it is the difference between noticing a loose wheel in the stand and discovering it in a corner. The rest of this guide assumes you would rather find problems at home.
It helps to think of maintenance in three triggers rather than one. Some tasks run on time: lubricants oxidize, cables corrode, and seals dry out whether or not you ride. Some run on distance: chains, brake pads, and tires wear in proportion to miles. And some run on evidence: a new noise, a soft brake, a wobble you feel through the bars. A good checklist covers all three, which is why the layers below mix a calendar (weekly, monthly, seasonal), a measurement (chain wear), and a set of senses you use every ride.
The essential home tool kit
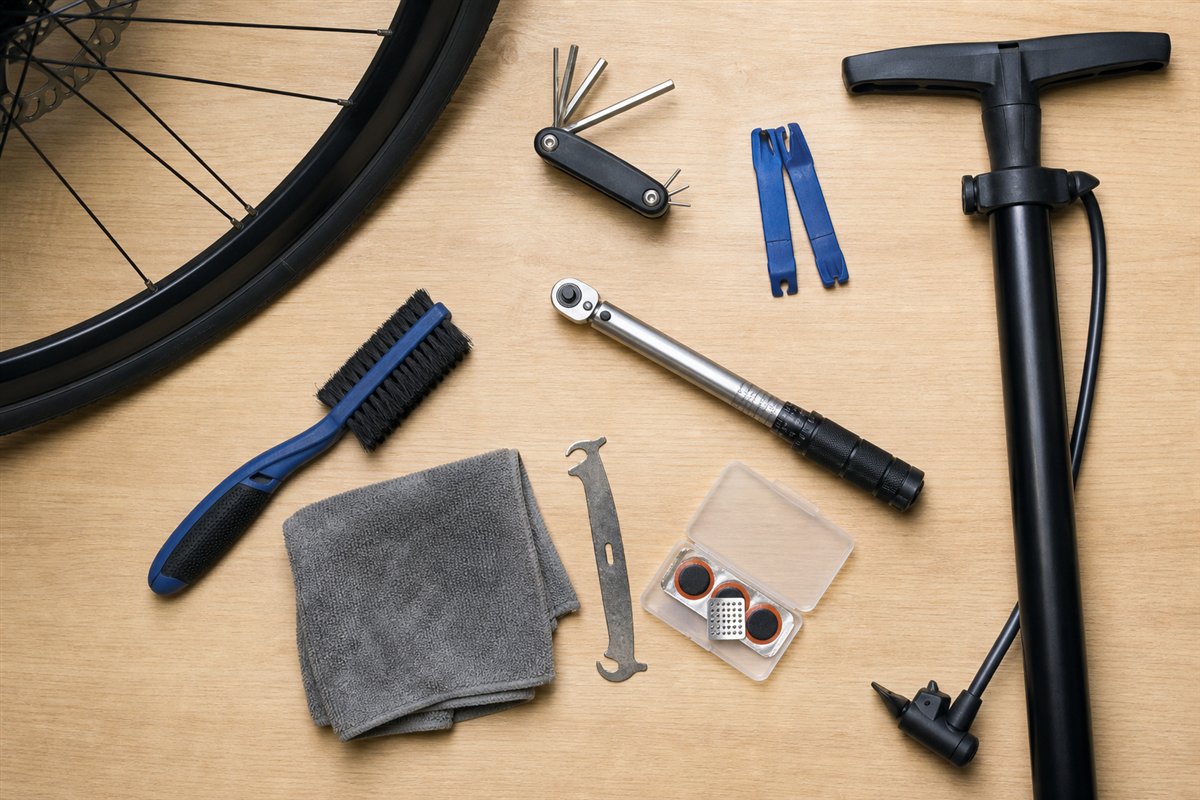
You do not need a workshop wall of tools to keep a bike healthy. You need a compact kit that covers inflation, adjustment, cleaning, puncture repair, and wear measurement. Buy for the bike you actually own—check its valve type, axle standard, and fastener sizes before you order anything, because a tool that “almost fits” can round a bolt or damage an expensive part.
What to buy first
Start with a floor pump that has a readable gauge and a chain wear indicator. These are the two measuring tools that prevent the expensive mistakes, and neither is glamorous. Everything else on the list below is about making adjustments and keeping things clean.
| Tool | What it’s for | Rough cost (USD) |
|---|---|---|
| Floor pump with gauge | Accurate tire pressure; prevents pinch flats and sluggish rolling | $30–60 |
| Chain wear indicator | Measures chain stretch so you replace it before it ruins the cassette | $10–25 |
| Hex/Allen key set (2–8 mm) | Nearly every adjustment bolt: stem, seatpost, brakes, bottle cages | $15–35 |
| T25 Torx key | Disc rotor bolts and many modern fasteners | $5–12 |
| Tire levers (2–3, plastic) | Removing a tire to fix a flat without damaging the rim | $5–10 |
| Patch kit and/or spare tube | Puncture repair at home or on the road | $5–15 |
| Chain lubricant + degreaser | Quiet, efficient, long-lasting drivetrain | $15–30 |
| Rags, brushes, nitrile gloves | Cleaning and inspection without oil on braking surfaces | $10–20 |
| Torque wrench (low range, 2–14 Nm) | Tightening carbon and critical bolts to spec, not by feel | $40–90 |
A low-range torque wrench earns its place the moment you own a carbon part, a lightweight stem, or any component with a torque figure printed next to the bolt. It is not a breaker bar and it does not make a damaged fastener safe—but it stops both the under-tightening that lets bars slip and the over-tightening that cracks components.
A few clarifications on the list above, because the details matter more than the brand. Buy quality hex keys, not the cheapest set—rounded, soft keys round out bolts and turn a simple adjustment into a drilling job. A folding set or a set of individual L-keys with a ball end on the long arm is far more pleasant to use than a stubby multitool for bench work. For lubricant, match it to your conditions: a dry (wax-based) lube stays cleaner in dusty, dry weather, while a wet lube lasts longer through rain but attracts more grit. Do not use general household oils like WD-40 as a chain lube—it is a solvent and a water displacer, not a lubricant, and it strips the lube you want to keep. Keep degreaser and anything oily well away from braking surfaces; a drop of oil on a disc rotor or rim can ruin braking and, on discs, contaminate a pad permanently.
Deliberately left off the starter list are the specialist tools you buy only when a specific job demands them: cassette lockring tools, chain-whips, bottom-bracket tools, bleed kits, and suspension tools. Each is tied to a component standard on your particular bike, so buying them speculatively is how drawers fill with tools that almost fit. Keep your bike and component manuals with the kit, and buy the specialist tool the day the job—and the exact standard—is in front of you.
The on-bike kit
Separate from the home kit, carry a small kit for failures you can realistically fix away from home: a spare tube, tire levers, a mini pump or CO2 inflator, a multitool with the hex sizes your bike uses, and a correctly sized quick link for your chain. Practice a tube change in the kitchen before you need it at the roadside in the dark. For getting the pressure right once you are home, the tire pressure calculator takes your weight, tire width, and surface into account instead of guessing off the sidewall maximum.
Pre-ride quick checks: the ABC method
The pre-ride check is the one habit worth building above all others. Mechanics teach it as ABC—Air, Brakes, Chain (and Cranks)—because those three words cover the systems that matter most in under a minute. Do it every ride, especially after the bike has been transported, borrowed, or worked on.
- A — Air. Squeeze the tires and top them to your target pressure with the pump gauge. Under-inflation is the leading cause of pinch flats; over-inflation on rough roads costs comfort and grip. Glance at the tread and sidewalls for cuts or embedded debris while you are down there.
- B — Brakes. Squeeze each lever. It should feel firm and stop well short of the bar, and the bike should not roll when the brake is held. Look at pad wear and, on disc brakes, listen for contamination (a loud howl or a glazed pad often means oil where it should not be).
- C — Chain and cranks. The chain should look lubricated, not dry or gritty, and run quietly through the gears. Grab a crank arm and rock it side to side—no play. Do a quick wheel check too: lift each end and spin; the wheel should be true and the quick-release or thru-axle fully closed and tight.
One habit ties the ABC block together: the drop test. Lift the bike an inch off the ground and let it bounce on its tires. A healthy bike lands with a single clean thud. Rattles, buzzes, or a clunk point you straight at whatever is loose—a bottle cage, a rack bolt, a headset, a saddlebag—before you are moving. It takes two seconds and often catches the thing a visual scan misses.
If any of these fail, fix it before you ride. A pre-ride check that finds a problem has done its job. For a fuller walkthrough with photos, see the pre-ride bike check guide.
Weekly checks
Weekly maintenance is about cleaning enough to inspect, and keeping the drivetrain happy. For a regular commuter or trail rider this might be after every few rides; for occasional riders, genuinely weekly is fine. The goal is to catch wear and contamination before they accelerate.
- Wipe the chain with a rag, then re-lube if it looks dry or you rode in the wet. Let lube soak in, then wipe the excess—a wet, oily chain just collects grit.
- Clean visible dirt off the frame, rims, and drivetrain so you can actually see what you are inspecting.
- Check tire tread and sidewalls closely for cuts, bulges, or worn tread, and pick out any embedded glass or flint.
- Confirm brake pads still have material and are hitting the rim or rotor squarely.
- Recharge lights and check that mounts, racks, and bottle cages are still tight.
- Investigate any new creak, click, or rub you noticed during the week rather than tuning it out.
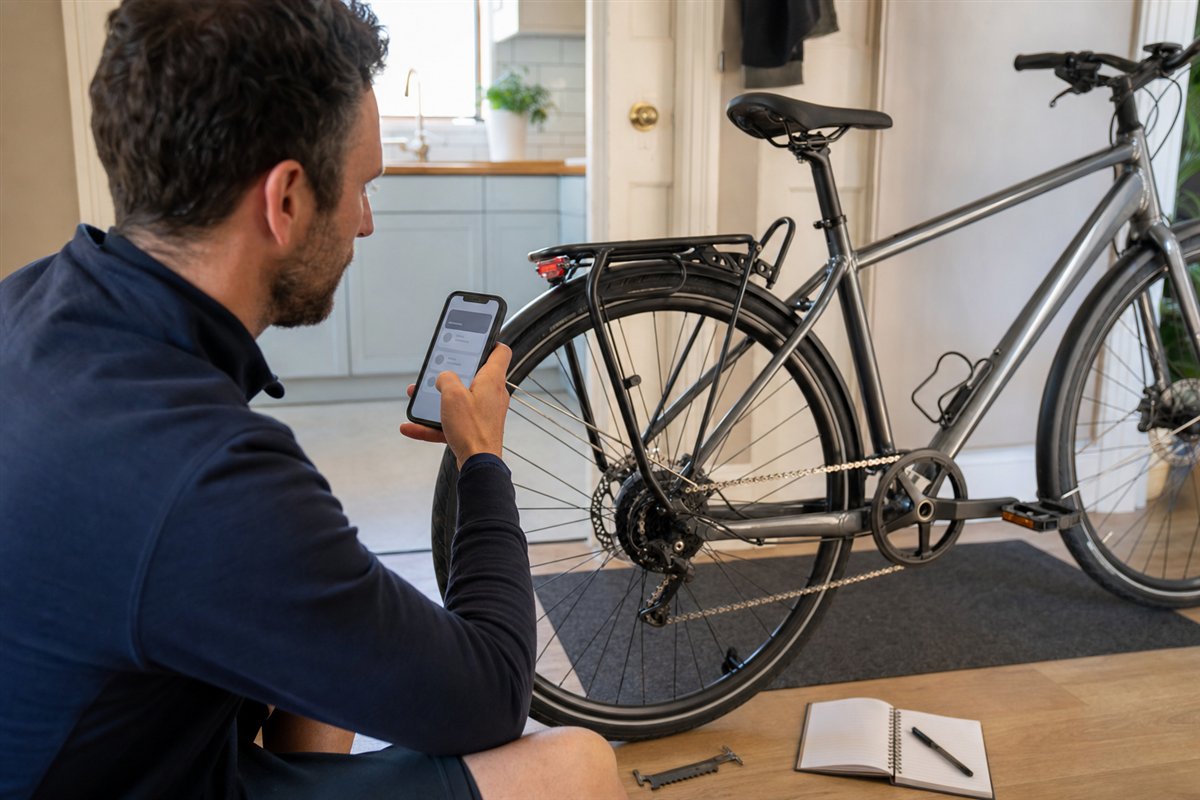
Keeping a short log—a notebook or a note on your phone—turns “I think I lubed it recently” into a date you can trust. It also makes chain replacement predictable: if you log the miles, the drivetrain maintenance guide explains how to read wear and swap the chain before it damages the cassette.
Monthly checks
Monthly is when you measure rather than eyeball. Pressures and lube are about habit; the monthly pass is about wear that creeps up slowly and is cheapest to fix early.
- Measure chain wear with the indicator. Replace the chain at the manufacturer’s limit—waiting too long forces a new cassette and chainrings too.
- Inspect brake pads for remaining material and even wear; replace before the wear line or before metal shows.
- Check for bearing play at the headset (rock the bike with the front brake on), wheels, and bottom bracket. Any knock or grinding is a flag.
- Look over cables and hoses for fraying, kinks, or corrosion; sluggish or vague shifting often traces back to a dying cable.
- Re-check torque on stem, seatpost, and any bolt you have adjusted, using the wrench and the printed spec.
- Clean the frame thoroughly enough to spot cracks, chips, or paint bubbling that can hint at damage underneath.
A note on chain wear, since it drives so much of the cost. Most indicators read chain “stretch”—actually wear at the pins and rollers—as a percentage. As a rough guide, replacing a chain around 0.5% wear (0.75% for many older or wider drivetrains) usually lets the existing cassette accept the new chain; ignore it past around 1% and the worn chain has already reshaped the cassette teeth, so a new chain will skip and you are buying both. Check the figure printed by your chain and gauge maker rather than trusting a single number, because 11- and 12-speed chains are less tolerant than older ones. This one measurement is where a checklist pays for itself.
The bike maintenance schedule guide explains how to shorten these intervals in wet, muddy, dusty, or high-mileage conditions—the calendar is a starting point, not a rule.
Seasonal and annual checks
Twice a year, or at the change of riding seasons, do a deeper pass and address the jobs that depend on elapsed time rather than distance. This is also the natural point to book professional service for anything on the shop-only list below.
- Replace shift and brake cables and housing if shifting has gone vague or braking spongy over the season.
- Fresh bar tape or grips, which also lets you inspect the bars and controls underneath.
- Service or check bearings—hubs, headset, bottom bracket—for smoothness and play; repack or replace as the manuals direct.
- Follow component manuals for suspension service intervals, hydraulic brake bleeds, and e-bike battery, motor, and firmware care. These run on hours and dates, not just miles.
- Inspect the frame and fork carefully for cracks, especially around welds, the head tube, and dropouts.
- A full drivetrain deep clean and, if the chain gauge says so, a fresh chain—and cassette if it skips on the new one.
Do not postpone a known problem just because its calendar date has not arrived. A bulging tire, a weak brake, a loose wheel, steering play, suspected structural damage, or a damaged e-bike battery jumps the queue every time.
The printable consolidated checklist
Here is every routine task in one table, grouped by how often it runs. Print it, keep it by the bike, and initial each item as you go. The frequencies assume moderate riding in fair conditions—tighten them for wet, muddy, dusty, or heavy use.
| Task | Pre-ride | Weekly | Monthly | Seasonal |
|---|---|---|---|---|
| Tire pressure to target | ✓ | |||
| Tire and sidewall inspection | ✓ | ✓ | ||
| Brake lever feel and stopping | ✓ | |||
| Wheel security (QR/thru-axle) | ✓ | |||
| Chain looks lubed, runs quiet | ✓ | |||
| Quick creak/rub investigation | ✓ | |||
| Wipe and re-lube chain | ✓ | |||
| Clean frame and drivetrain | ✓ | ✓ | ||
| Brake pad material check | ✓ | ✓ | ||
| Lights charged, mounts tight | ✓ | |||
| Measure chain wear | ✓ | |||
| Bearing play (headset/hubs/BB) | ✓ | ✓ | ||
| Cable and hose inspection | ✓ | |||
| Re-torque key bolts to spec | ✓ | |||
| Replace cables and housing | ✓ | |||
| Bar tape / grips refresh | ✓ | |||
| Bearing service/repack | ✓ | |||
| Suspension / brake bleed (per manual) | ✓ | |||
| Frame and fork crack inspection | ✓ | |||
| Professional service booking | ✓ |
Treat this as a starting template. A daily wet-weather commuter will move several “monthly” rows to weekly; a fair-weather road rider covering low mileage can relax some intervals. The point is to have a written baseline you adjust deliberately, not to guess.
What to leave to a bike shop
A good home checklist knows its own limits. Some jobs need training, proprietary information, or specialist equipment, and improvising them risks either your safety or an expensive part. Hand these to a qualified mechanic:
- Cutting hydraulic hoses and bleeding brakes, and diagnosing contaminated brake systems.
- Suspension internals service beyond the basic maintenance in the manual.
- Wheel building and truing a badly buckled wheel.
- Bearing press-fit work and stuck or seized components.
- Opening e-bike electrical systems, batteries, and motors.
- Any suspected structural damage to a frame or fork—inspection and repair both.

None of this means you are stuck. The home checklist covers the frequent, low-risk work that keeps a bike safe and efficient between shop visits, and it makes those visits shorter and cheaper because you catch problems early and describe them precisely. When something is beyond the kit—or beyond what generic guidance can confirm is safe—that clean handoff to a mechanic is the responsible next step, not a failure. For a shop-facing view of what a full service covers, see the bike service checklist.
Frequently asked questions
What tools do I need for basic bike maintenance?
A workable starter kit is a floor pump with a gauge, hex/Allen keys from 2 to 8mm, a T25 Torx key, tyre levers, chain lubricant, and a rag. That covers pressure checks, most bolt adjustments, cleaning, and puncture repair without buying specialist workshop tools too early.
What should be on a basic bike maintenance checklist?
A simple checklist covers tyre pressure, brake function, chain lubrication and wear, quick-release or thru-axle tightness, and a bolt check on the stem, seatpost, and bottle cages. Run the quick items before every ride and the wear checks weekly or monthly.
What are the most essential bike maintenance tools to buy first?
Buy a floor pump with a gauge and a chain wear indicator first. These two measuring tools prevent the most expensive mistakes: under-inflation that causes pinch flats, and a stretched chain that ruins the cassette.
How do I use a printable bike maintenance checklist?
Keep it near the bike and initial each item as you complete it. Run the pre-ride ABC block every time, tick the weekly and monthly rows on a calendar, and note any item you deferred so a small issue does not turn into a roadside failure or a costly repair.
Continue the topic
More maintenance planning guides
 Bike Maintenance Schedule by Use and Conditions
 Bike Maintenance: The Complete Practical Guide
 Bike Service Checklist: What to Ask a Shop
Watch the technique
How To Choose A Basic Bike Tool Kit
Video by Global Cycling Network · Watch on YouTube